
Stock Sanat Specialized Magazine


Most coating failures on ships, boats and offshore steel do not start with a bad paint. They start with a bad surface. Marine paint surface preparation decides whether the primer bonds for years or blisters within months.
This guide to marine paint surface preparation explains blast grades such as Sa 2.5, surface profile, soluble salt checks, dust control and the time limit before priming. It is written for shipyards, boat builders, contractors and industrial buyers who need to specify and verify the work.
Table of Contents
Why Marine Paint Surface Preparation Comes First
Steel in a marine setting meets salt, moisture, sun and abrasion every day. A coating can only resist these stresses if it sticks to clean steel. Rust, mill scale, oil and salt under the film all weaken that bond.
Paint makers test their products on prepared panels, so good marine paint surface preparation is what makes the lab result repeatable on site. In the field, the result depends on how close the real surface comes to that panel. That is why paint data sheets always state a required surface standard and profile.
Key point: Surface preparation is not a cost to cut. A premium coating over a poor surface fails just like a cheap one, and repainting costs far more than the original job.
For product background, see our marine paint buying guide and the notes on marine paint standards.
Step 1: Remove Oil, Grease and Contamination
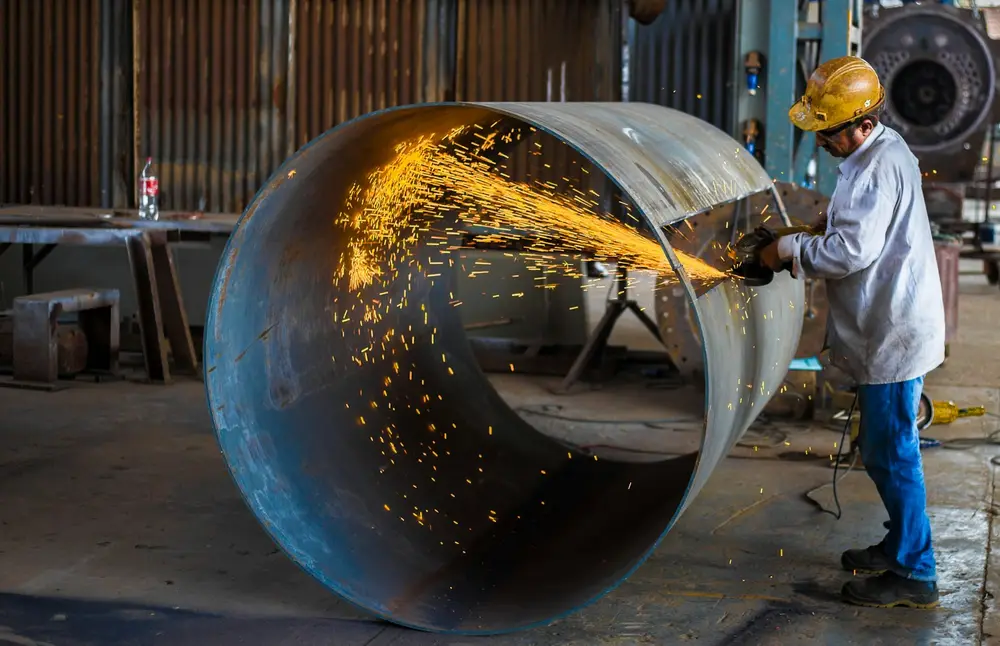
Blasting does not remove oil. It drives oil into the steel and spreads it. So the first step of any marine paint surface preparation job is cleaning before blasting.
- Remove oil and grease with solvent or alkaline cleaner and clean rags or washing, changing rags often.
- Wash off visible salt, mud and marine growth with fresh water. High-pressure fresh water works well on hulls.
- Grind away weld spatter, sharp edges and rough weld seams. Rounded edges hold paint better than sharp ones.
- Mark pits and laminations so they can be repaired before painting.
Plan this stage with the weld and edge design in mind. Sharp corners thin the paint film and corrode first, which is why stripe coats are common on edges.
Step 2: Understand Blast Grades and Sa 2.5
ISO 8501-1 describes the starting condition of steel with four rust grades, A to D. It also defines blast-cleaning grades, shown by the letters Sa. The standard comes with photographs that help inspectors compare the real surface with a reference.
ISO 8501-1 Blast Cleaning Grades
| Grade | Name | What the steel looks like |
|---|---|---|
| Sa 1 | Light blast cleaning | Loose mill scale, rust and old paint removed. Firmly bonded material may remain. |
| Sa 2 | Thorough blast cleaning | Most mill scale, rust and coating removed. Remaining residue is firmly bonded. |
| Sa 2.5 | Very thorough blast cleaning | No visible oil, dirt, mill scale or rust. Only slight stains in spots or stripes. |
| Sa 3 | Blast cleaning to visually clean steel | Uniform metallic colour. No visible residue at all. |
Most marine primers, especially zinc-rich and immersion systems, ask for Sa 2.5. It gives a clean, uniform surface without the extra cost and time of Sa 3.
Why Sa 2.5 Is the Common Target
Sa 2.5 balances quality and cost. Sa 2 can leave bonded mill scale, which may flake later and take the coating with it. Sa 3 gives a very clean surface, but it costs more and the steel flash rusts quickly in humid air.
Always take the grade from the paint data sheet and the project specification, not from habit. Some maintenance systems accept lower grades or hand tool cleaning.
Step 3: Check the Surface Profile
Cleaning is only half of marine paint surface preparation. The steel also needs a roughness profile so the primer has something to grip. Roughness is measured from peak to valley, and ISO 8503 covers the grading and measuring of blast-cleaned steel.
- Steel grit is angular and gives a sharp, deep profile.
- Steel shot is round and gives a rounded, peened surface.
- Mixed or crushed mineral abrasives are used in open-air work, but they must be clean and low in salt.
Many primer data sheets call for a profile of roughly 40 to 75 microns. Treat that range as an example only. Use the figure on the data sheet of your own product and measure it with a replica tape or a profile gauge.
Do not chase a deeper profile. If the peaks stand taller than the primer film, they can show through the coating and rust early.
Step 4: Test for Soluble Salts
Salt is the hidden enemy of marine paint surface preparation. Steel can look perfectly clean at Sa 2.5 and still carry chlorides in pits and rust scars. Under a coating, those salts draw in water by osmosis and cause blisters.
How Salt Contamination Before Painting Is Measured
- Place a Bresle patch on the blasted steel and inject a measured volume of pure water.
- Let the water dissolve the salt, then draw it back with the syringe (ISO 8502-6).
- Measure the conductivity of the sample (ISO 8502-9).
- Convert the reading to mg/m2 and compare it with the specification.
The allowed level depends on the project. Immersion linings usually have the strictest limits. For example, the IMO ballast tank rule sets a maximum of 50 mg/m2 of soluble salts. Check your own specification and data sheet for the limit that applies to you.
If the reading is too high, wash with fresh water and re-test. Pitted steel may need dry blasting again after the water wash, then another salt test.
Surface preparation
Good preparation starts with the right primer.
Match your surface preparation level with a suitable Bajak primer. Our team can advise on the correct choice.
Step 5: Control Dust Before You Coat
Dust control is a key part of marine paint surface preparation. Blasting leaves dust on the surface. Paint over dust and you coat the dust, not the steel. Remove it with clean, dry, oil-free compressed air or vacuum.
ISO 8502-3 describes a pressure-sensitive tape test. You press tape on the steel, lift it and compare the dust with reference images for quantity and size. Specifications set the maximum accepted rating, so use the one in your documents.
Also keep the abrasive itself clean. Check it for oil and salt, and avoid reusing contaminated abrasive.
Step 6: Respect the Time Limit Before Priming
Freshly blasted steel is very active. In humid coastal air, a thin layer of flash rust can appear in hours. That layer weakens adhesion and can trap moisture.
Therefore, in marine paint surface preparation, the time between blasting and priming should be as short as possible. The safe window depends on humidity, steel temperature and the paint system, so use the figure on the data sheet and the project rules.
Weather Conditions During Surface Preparation and Painting
- Keep the steel at least 3 °C above the dew point to avoid condensation.
- Measure air temperature, steel temperature and relative humidity, and record them.
- Stop blasting or painting if conditions drift outside the data sheet limits.
- Use dehumidification in tanks and enclosed spaces where the climate cannot be controlled.
If flash rust forms before the primer goes on, the steel must be cleaned again to the specified grade. Do not paint over it.
Choosing the Right Primer After Marine Paint Surface Preparation
A good surface is only worth the effort if the primer matches it. A zinc-rich primer such as Bajak 65% Zinc-Rich Epoxy needs a clean, profiled surface to work as intended. Intermediate and topcoat layers then build the barrier, for example with Bajak Epoxy Polyamide Coating.
You can browse more options in our primers category. For repainting intervals and maintenance planning, read about how often to repaint a ship hull.
Learn more about the process from this overview of abrasive blasting on Wikipedia.
Quick Checklist for Marine Paint Surface Preparation
| Stage | Check | Typical tool or method |
|---|---|---|
| Before blasting | Oil, grease, salt, sharp edges | Solvent cleaning, fresh water wash, grinder |
| After blasting | Cleanliness grade (Sa 2.5) | ISO 8501-1 reference photographs |
| After blasting | Surface profile | Replica tape or profile gauge |
| After blasting | Soluble salts | Bresle patch and conductivity meter |
| After blasting | Dust | Pressure-sensitive tape test |
| Before priming | Dew point and humidity | Climate meter and steel thermometer |
| After priming | Film thickness | Wet film gauge, then dry film gauge |
Common Mistakes in Marine Paint Surface Preparation
- Skipping the salt test because the steel looks clean.
- Blasting over oil and grease.
- Ignoring edges and welds, then wondering why paint fails there first.
- Priming too late, over flash rust.
- Using dirty or recycled abrasive with salt in it.
- Painting in high humidity without checking the dew point.
Marine Paint Surface Preparation FAQ
What is marine paint surface preparation?
Marine paint surface preparation is the work done on steel before any coating is applied. It includes removing oil, salts, rust, mill scale and old paint, then creating a clean, rough profile so the primer can bond. It is usually the biggest factor in how long a marine coating lasts.
What does Sa 2.5 mean in blast cleaning?
Sa 2.5 is the ISO 8501-1 grade called very thorough blast cleaning. Viewed without magnification, the steel shows no visible oil, grease, dirt, mill scale, rust or old coating. Any remaining traces are limited to slight stains in the form of spots or stripes.
Is Sa 2.5 always required for marine paint?
No. The required grade comes from the paint system data sheet, the project specification and the exposure. Zinc-rich primers and immersion linings usually call for Sa 2.5, while some maintenance systems accept lower grades or hand tool cleaning. Always follow the technical data sheet of the coating you use.
How do you check salt contamination before painting?
Soluble salts are not visible, so they are measured. The usual method is the Bresle patch from ISO 8502-6, read with a conductivity meter as described in ISO 8502-9. The result is reported in mg/m2 and compared with the limit in your specification or the paint data sheet.
How soon must steel be primed after blasting?
Prime as soon as possible, ideally the same shift. Blasted steel can show flash rust within hours in humid coastal air. The exact limit depends on humidity, steel temperature and the specification, so check the paint data sheet and the project rules before you start work.
What is a surface profile and why does it matter?
The surface profile is the peak-to-valley roughness left by blasting. It gives the primer something to grip, like a key for the coating. If the profile is too shallow, adhesion drops. If it is too deep, peaks can poke through the film. Data sheets state the range.
Final Thoughts
Good marine paint surface preparation follows a clear order: clean the steel, blast to the specified grade, check profile, salt and dust, then prime before flash rust forms. Each step is measurable, so each step can be recorded.
Write those marine paint surface preparation limits into your specification before the job starts. It protects the owner, the applicator and the coating.
Talk to Our Technical Team
Planning a vessel, tank or steel structure and unsure which surface standard your coating needs? Send us the steel condition, the environment and the paint system. You can contact our technical team or browse the primers category.
Recent Posts