
Stock Sanat Specialized Magazine

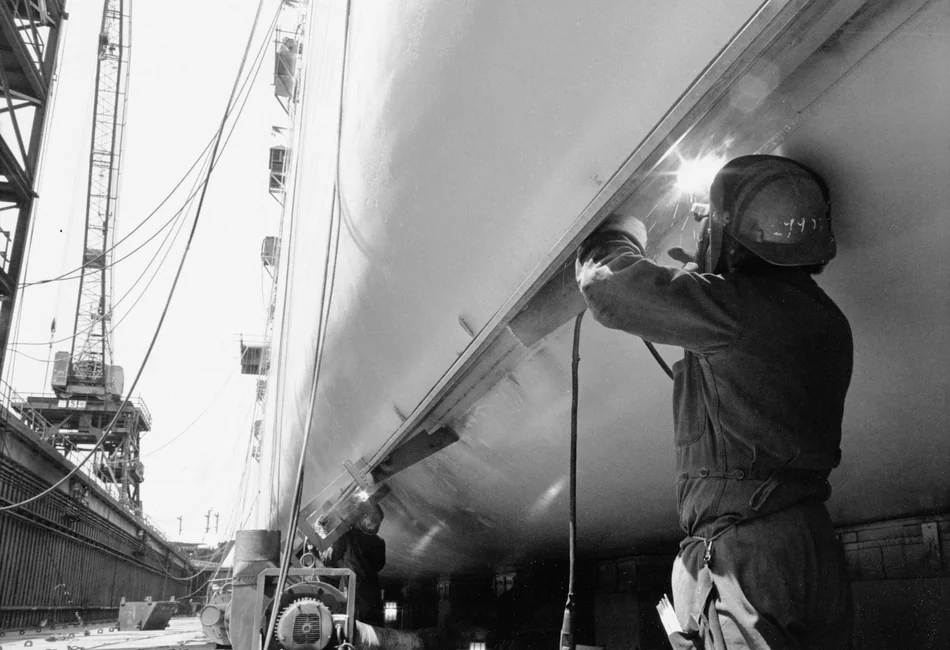
A vessel only sits in the dock for a short time, and every day costs money. Well-planned dry dock coatings work keeps the schedule, the budget and the paint warranty safe.
This guide gives shipowners and repair contractors a 12-step ship repair painting checklist. It follows the real order of work in the yard: wash, survey, blast, repair or recoat, prime, tie coat, antifouling, DFT checks and records.
Table of Contents
Dry Dock Coatings: Why the Sequence Matters
Most hull coating failures start with a skipped or rushed step, not with a bad paint. Salts left on the steel, a missed overcoat window or a thin film on an edge can each shorten the life of the whole system.
A written sequence gives the yard, the owner and the paint supplier one shared plan. It also makes inspection easy, because every step has a clear hold point and a record. Good dry dock coatings planning is mostly good paperwork.
The checklist below covers dry dock coatings for the underwater hull. The same logic applies to boot-top and topsides. For the theory behind each layer, read our guide to the marine coating system.
12-Step Dry Dock Coatings Checklist at a Glance
Hand this table to the yard before docking. Each step is explained in the sections that follow.
| Step | Task | What to record |
|---|---|---|
| 1 | Agree scope and paint specification | Approved specification, areas and quantities |
| 2 | Check paint, data sheets and batches | Batch numbers, shelf life, storage conditions |
| 3 | Dock the vessel and wash the hull | Wash method, date, areas cleaned |
| 4 | Survey the existing coating | Condition map with photos |
| 5 | Decide spot repair or full recoat | Area percentages and the decision |
| 6 | Prepare the surface | Cleanliness grade, profile, salt test |
| 7 | Check the weather and the surface | Humidity, steel and dew point temperatures |
| 8 | Apply the anticorrosive primer and stripe coats | Times, thinner, wet film readings |
| 9 | Apply the tie coat where required | Overcoat interval used |
| 10 | Apply the antifouling | Coats, colors, application time |
| 11 | Measure DFT and inspect | DFT readings and repair list |
| 12 | Close the documentation before undocking | Final report and coating records |
Steps 1 to 3: Plan, Check the Paint and Wash the Hull
Step 1: Agree the scope and the paint specification
Start weeks before docking. Define the dry dock coatings scope and write down which areas get a full recoat, which get a spot repair and which stay untouched. Include the flat bottom, vertical sides, boot-top, rudder, propeller area and sea chests.
Base the plan on the vessel history, the trading area and the planned time to the next docking. Our article on how often a ship hull should be repainted explains how docking cycles shape the choice.
Step 2: Check the paint, data sheets and batches
Order all dry dock coatings early, together with thinner and cleaning solvent, and build the dry dock paint schedule around the delivery dates. Check the technical data sheet of each product for the film thickness, drying time, overcoat interval and temperature limits.
- Check batch numbers and shelf life on every can.
- Store paint dry, shaded and within the temperature range on the data sheet.
- Confirm that primer, tie coat and antifouling come from one compatible system.
- Keep a copy of each data sheet in the project file.
Step 3: Dock the vessel and wash the hull
Once the vessel is on the blocks, wash the hull with fresh water as soon as possible, before the fouling dries and hardens. High-pressure washing removes marine growth, mud and loose antifouling.
Wash again after blasting only if dust or salts have returned. Do not let the hull dry with a layer of sea salt on it. Clean steel is the base for all dry dock coatings.
Steps 4 and 5: Survey the Hull and Choose Repair or Recoat
Step 4: Survey the existing coating
Walk the hull with the owner’s superintendent and the paint supplier. Mark the areas with rust, blistering, cracking, mechanical damage and heavy fouling. Take photos with a reference mark so each area can be found again.
Check the old coating for adhesion, and note the type of the old antifouling. The type matters later, because it decides whether a tie coat is needed. Survey results drive every later decision on dry dock coatings.
Step 5: Decide between spot repair and full recoat
This is the biggest cost decision in the dry dock coatings plan. Spot repair is quick, but only works when the remaining coating is sound. Full recoat costs more and takes longer, but resets the system.
| Condition of the hull | Usual decision |
|---|---|
| Small local damage, intact coating around it | Spot repair of the damaged area |
| Scattered rust spots and general wear | Spot repair plus a full new antifouling coat |
| Widespread breakdown, blistering or poor adhesion | Blast and recoat the full system |
| Old coating too thick or cracked | Partial or full removal, then recoat |
Many owners agree a trigger value with the yard, for example the share of damaged area above which a full recoat is ordered. The class society and the paint supplier can advise on the limit for your vessel.
Steps 6 and 7: Prepare the Surface and Control the Conditions
Step 6: Prepare the surface
Surface preparation decides how long dry dock coatings last. For repaired areas, abrasive blasting to Sa 2.5 (ISO 8501-1) is the common target, with a surface profile as given on the primer data sheet. Intact old coating can be roughened and cleaned instead.
- Remove oil, grease and dirt before blasting.
- Blast to the cleanliness grade in the specification.
- Test soluble salts on the blasted steel and compare with the specified limit.
- Remove all dust before painting.
- Round sharp edges and grind weld spatter.
Read more about each task in our guide to marine paint surface preparation.
Step 7: Check the weather and the surface
Check the conditions before every coat, not only the first one. A common rule is that the steel temperature must be at least 3 °C above the dew point, and the relative humidity should stay within the limit on the data sheet.
If conditions are poor, stop and wait. Flash rust on blasted steel, or moisture under the paint, will show up later as blisters or early failure. Poor conditions can ruin even the best dry dock coatings.
Dry-dock supply
Preparing a dry-docking? Order your coatings early.
Stock Sanat Caspian supplies Bajak marine coatings in the volumes shipyards need. Send your paint list for a quotation.
Steps 8 to 10: Apply the Dry Dock Coatings System
Step 8: Apply the anticorrosive primer and stripe coats
Apply the first coat quickly after blasting, before flash rust forms. A two-pack epoxy such as Bajak Epoxy Polyamide Coating is a typical choice for the anticorrosive layers of dry dock coatings, subject to your specification.
Stripe coat the edges, welds, bolts and other hard-to-cover details by brush before each full coat. Sharp edges tend to have the thinnest film.
Follow the mixing ratio, the induction time and the pot life on the data sheet. Respect the minimum and maximum overcoat intervals between coats. For a complete walkthrough of layers, see how to paint a ship hull.
Step 9: Apply the tie coat where required
A tie coat is a compatible intermediate layer that bonds the new antifouling to the epoxy or to an aged old antifouling. It is not always needed. Ask the paint supplier, because it depends on the old coating and on the chosen antifouling.
When a tie coat is specified, apply it inside its overcoat window. This is one of the most common reasons for delamination in dry dock coatings work.
Step 10: Apply the antifouling
Apply the antifouling last on the underwater hull, within the interval allowed after the previous coat. Choose the product by the speed, the trading pattern and the time between dockings, for example Bajak Antifouling Paint.
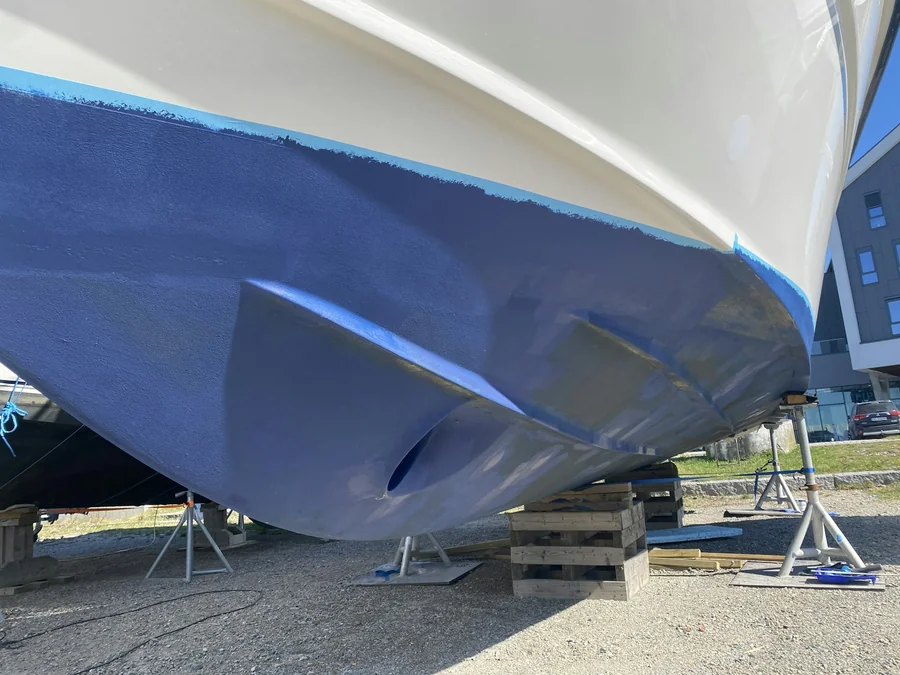
Keep the colors of the coats different, so that wear can be seen and missed areas are easy to find. Check that the antifouling meets the rules of the IMO anti-fouling systems convention and of the flag state.
Ready to compare products for your docking? Browse the marine paint range and request data sheets.
Steps 11 and 12: Inspect, Measure and Document
Step 11: Measure DFT and inspect
Dry film thickness (DFT) is the proof that the dry dock coatings were applied as specified. Measure it with a calibrated gauge after each coat where possible, and on the full system when it is dry. ISO 19840 covers DFT measurement on blast-cleaned steel.
- Check wet film thickness during application to avoid rework.
- Measure dry film thickness at the agreed number of points per area.
- Look for runs, sags, pinholes, dry spray and missed areas.
- Repair every defect before the next coat or before launch.
Record any area that is below the specified thickness and repair it according to the data sheet.
Step 12: Close the documentation before undocking
Do not undock until the coating has reached the minimum cure time stated for the antifouling. Then collect the records of the dry dock coatings in one file for the owner and the class surveyor.
- Paint specification and the approved data sheets
- Batch numbers, dates and the weather log
- Surface preparation grades and salt test results
- DFT readings with the gauge calibration certificate
- Photos before, during and after the work
- Anti-fouling declaration or certificate as required
These records make the next docking faster, because the next team will know exactly what is on the hull.
Dry Dock Paint Schedule: A Simple Order of Work
The days per step depend on the yard, the weather and the area, so agree the dry dock paint schedule with the yard in writing. The order below stays the same for dry dock coatings on almost every job.
- Dock, wash and survey the hull.
- Blast and clean the repaired areas.
- Prime and stripe coat the bare steel.
- Apply the build coats and the tie coat.
- Apply the antifouling and the topside coats.
- Measure DFT, repair defects and hand over the records.
Leave a few buffer days for rain, wind and re-work. Painting a damp hull to save time almost always costs more later.
Common Dry Dock Coatings Mistakes to Avoid
These mistakes cause most early failures of dry dock coatings. All of them are easy to prevent with the checklist above.
- Skipping the salt test. Salts under the paint draw water and cause blisters.
- Missing the overcoat window. Too early traps solvent. Too late weakens the bond.
- Mixing incompatible products. Use one system or confirm compatibility with the manufacturer.
- Skipping the stripe coat. Edges and welds are where rust starts first.
- Painting in poor weather. Humidity and low steel temperature spoil the film.
- Poor records. Without DFT and batch data, warranty claims are hard to support.
Frequently Asked Questions
What are dry dock coatings?
Dry dock coatings are the paints applied to a ship while it is out of the water for repair. They normally include an anticorrosive primer, epoxy build coats, a tie coat where needed and antifouling for the underwater hull. They are applied after cleaning and blasting the steel.
How long does ship repair painting take in dry dock?
The time depends on the hull area, the amount of blasting, the weather and the coating system. Each of the dry dock coatings needs its drying and overcoat time. Ask the yard for a written dry dock paint schedule before docking and include buffer days for rain, wind and rework.
Should you spot repair or recoat the whole hull?
Spot repair suits a hull with sound coating and only local damage. A full recoat is better when rust, blistering or poor adhesion is widespread. Survey the hull first, then agree a trigger value with the yard and the paint supplier before work starts.
What surface preparation is needed before painting a hull?
Wash the hull with fresh water, remove oil and grease, then blast bare steel to the specified grade, often Sa 2.5. Check the surface profile and test for soluble salts. Remove all dust before applying the first coat, and paint before flash rust forms.
Why is a tie coat used before antifouling?
A tie coat bonds the new antifouling to the epoxy layer or to an aged old antifouling. It reduces the risk of delamination when the products would not bond well directly. Whether you need one depends on the old coating, so check with the paint supplier.
Which documents should be kept after a dry docking?
Keep the paint specification, data sheets, batch numbers and the weather log. Add the surface preparation grades, salt test results, DFT readings, photos and any antifouling certificate. These records help with warranty claims and make the next docking easier to plan.
Conclusion: Plan Dry Dock Coatings Before the Vessel Arrives
A good dry docking is mostly decided before the vessel enters the dock. With a clear specification, a hull survey, proper preparation and a record of every coat, dry dock coatings work finishes on time and lasts to the next docking.
Need paint for your next docking? See our marine paint category for epoxy, primer and antifouling options, or request a quote from the Stock Sanat team with your vessel details and docking dates.
Recent Posts